Partition Your Hard Disk


Shrink Your Hard Disk Drive:


1.) Right click on My Computer and click on Manage. Select "Disk Management".


2.) Right click on the partition you want to partition and select "Shrink Volume".


3.) Enter the amount of space to shrink in MB (here I'm partitioning 20GB).


4.) Then you will get an unallocated partition that you have asked for.


5.) Right click on the unallocated partition and click "New Simple Volume".


6.) You will get a "New Simple Volume Wizard", click "Next".


7.) By default it will have maximum disk space, leave it and click "Next".


8.) Now assign the drive letter you want.


9.) Change the Volume label to your desired name and click "Next".


10.) Click "Finish".


11.) Here you see that my 20GB partitioned drive.


Extend Your Hard Disk Drive:


1.) Right click on the volume you want to delete and click "Delete Volume".


2.) Backup important data in that volume and click "Yes".


3.) Then your volume gets unallocated.


4.) Right click on the volume that you want to add the unallocated space and click "Extend Volume".


5.) You will get an "Extend Volume Wizard", click "Next".


6.) Select the disk you want to add and click "Next".


7.) Click "Finish".


8.) My 20GB partition is deleted and added to my D: drive.


Feel free to comment below.....


Myself M S Lalith signing off  !!!!!

Hack Wi-Fi In Android Phone

Downloads:


   WPS Connect - download

Procedure:


   1.) Download WPS Connect from above link and install it.

   2.) Open the app, and scan for wifi.


   3.) Select the wifi you want to hack and try any pin.


   4.) Voila !!!!! You got the password.....


Note: This works more efficient on Kitkat version.

          This is for educational purposes only and I'm not responsible for anything.

Happy Hacking ..........


Feel free to comment below.....


Myself M S Lalith signing off  !!!!!


Install VMware Tools In Kali Sana And Uninstall Them


Install VMware Tools In Kali Sana 2.0:


   1.) Goto "VM" menu and select "Install VMware Tools".


   2.) You will find VMware Tools CD drive on desktop, open it and copy the vmware tools tar file to desktop.

         In my case it is "VMwareTools-9.6.1-1378637.tar.gz".


   3.) Open Terminal and type "cd Desktop".


   4.) Type "tar xvzf tar_file_name.tar.bz".


         In my case it is "tar xvzf VMwareTools-9.6.1-1378637.tar.gz".


   5.) Then you will notice a folder named "vmware-tools-distrib" on your desktop. Type "cd vmware-tools-distrib" in terminal.


   6.) Now type "./vmware-install.pl" and hit enter.


   7.) Set default for everything by hitting enter except for one. It will ask "The path is not a valid path to the kali_version kernel headers. Would you like to change it? [yes]". Type "no" and hit enter.


   8.) Voila !!!!! VMware Tools has been installed.


Uninstall VMware Tools In Kali Sana 2.0:


   1.) Open teminal and type "sudo -i". If it asks for password, enter your machine's password.


   2.) Then type "cd /etc/vmware-tools".


   3.) Type "./installer.sh uninstall".


   4.) Voila !!!! VMware Tools has been uninstalled.


Feel free to comment below.....


Myself M S Lalith signing off  !!!!!

Install Kali Sana 2.0 On VMware


Downloads:


   Kali Sana 2.0 - download

   VMware Workstation - download

Installation:


   1.) Open VMware Workstation, goto "File" menu and select "New Virtual Machine" or you can press Ctrl + N.


   2.) Select "Typical" and click Next.


   3.) Select "Installer disc image file (iso)", browse to Kali Sana iso file.


   4.) Select "Linux" as Operating System and version to "Debian 7".


   5.) Enter your "Virtual machine name".


   6.) Enter the disk size you want to have (enter more than 15 GB).


   7.) If you want to increase your machine's memory then click "Customize Hardware".


   8.) Enter memory size in MB and hit Close.


   9.) Hit "Finish".


   10.) Now to turn on your machine, click "Power on this virtual machine".


   11.) It will go to "Boot Menu", select "Graphical install".


   12.) Select your "Language".


   13.) Select your "Country".


   14.) Configure your "Keyboard Style".


   15.) After installing additional components, enter the name of your machine.


   16.) Now it will ask you to enter "Domain name", leave it empty and click Continue.


   17.) Enter password for your machine.


   18.) After loading, it will ask for partitions. Select "Guided - use entire disk" and click Continue.


   19.) Now select the disk which you have allocated before.


   20.) It will ask you for partition scheme. Select "All files in one partition".


   21.) Select "Finish partitioning and write changes to disk" and click Continue.


   22.) It will ask for partition conformation, select "Yes".


   23.) Now it will install the necessary system files, this may take time.


   24.) Select "Yes" to use network mirror (recommended).


   25.) Leave blank in the "HTTP proxy information" box and click Continue.


   26.) It will configure the packages, this may take time.


   27.) Select "Yes" to install the GRUB boot loader (recommended).


   28.) Select "/dev/sda" and click Continue.


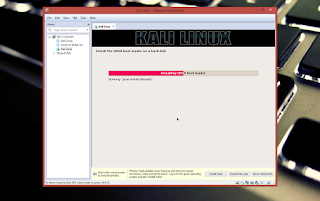
   29.) It will install the GRUB boot loader, this may take time.


   30.) Click "Continue" to finish the installation.


   31.) Now enter the username (default username is "root").


   32.) Enter password that you have created before.


   33.) Voila !!!! You are in Kali Sana 2.0


Feel free to comment below.....


Myself M S Lalith signing off  !!!!!